
How to Integrate an Assembled Circuit Board into Your Project?

Integrating an assembled circuit board into your venture is the significant bridge between prototyping and useful application. Whether you’re building a DIY electronics project, an mechanical control framework, or a customer item, the integration handle guarantees that your circuit works consistently inside the physical and coherent structure of your last design.
This direct will walk you through each stage of the integration prepare, covering contemplations, strategies, tips, and best hones to offer assistance you execute a clean and utilitarian integration.
1. Get it Your Assembled Circuit Board
Before hopping into the integration stage, it’s vital to get it the nature of your amassed circuit board:
• What is its reason in your project?
• What components are on the board?
• What are the control, flag, and information requirements?
• What interfacing or connectors does it use?
Types of Assembled Boards
• Development Boards: Like Arduino, Raspberry Pi, or ESP32, regularly utilized for prototyping.
• Custom PCBs: Particularly outlined and amassed for a specific application.
• Third-party Modules: Wi-Fi, Bluetooth, sensor, and engine driver boards.
Your integration arrange will contrast depending on whether you’re utilizing a general-purpose advancement board or a custom-built PCB.
2. Arrange the Integration Strategically
Once you get it your board, you require to arrange how to physically and electronically coordinated it into your venture. This includes:
• Mechanical Integration: How the board will be mounted or housed.
• Electrical Integration: How it will interface to control supplies and peripherals.
• Communication Interfacing: If your extend employments microcontrollers or communication conventions, you require to arrange the wiring and rationale accordingly.
Ask These Key Questions:
• Where will the board be put in the enclosure?
• Will it require assurance from vibration, dampness, or heat?
• How will it interface with sensors, engines, or displays?
Sketch out a framework square chart and a wiring schematic some time recently proceeding.
3. Select or Plan an Enclosure
The walled in area not as it were secures your circuit but too gives your extend a proficient wrap up. Depending on your application, the area may have your walls:
• Plastic Extend Boxes for common electronics
• Metal Cases for protecting and robustness
• 3D-Printed Cases for custom fits
• Industrial Walled in areas for tough environments
Mounting Tips:
• Use standoffs or mounting gaps to secure the PCB.
• Allow space for wind current to anticipate overheating.
• Ensure get to to buttons, ports, or status LEDs.
For bigger assemblies, secluded mounting (such as using DIN rails or slide-in trays) can move forward support and scalability.
4. Control Supply Integration
Power is the life saver of your circuit board. Improper control integration can cause precariousness or damage.
Key Considerations:
• Voltage and Current Necessities: Confirm the input voltage run and max current draw.
• Regulation and Sifting: Utilize voltage controllers or DC-DC converters as needed.
• Protection Highlights: Consider utilizing wires, TVS diodes, and turn around extremity protection.
If the venture is versatile, consider battery integration with appropriate charging and assurance circuits. For mains-powered applications, security gets to be foremost — guarantee your plan follows to measures and separator requirements.
5. Wiring and Connectivity
Reliable wiring is basic for reliable execution. Here’s how to approach it:
Use the Right Connectors
• Header Pins & Dupont Cables for prototyping
• Screw Terminals for strong connections
• Molex, JST, or Phoenix Connectors for production-level assemblies
Color-code your wires for simple investigating (e.g., ruddy for +V, dark for GND, yellow/white for signals).
Signal Integrity
• Keep advanced and analog signals partitioned to maintain a strategic distance from noise.
• For high-frequency or long cable runs, consider protected cables and turned pairs.
• Route ground associations carefully to maintain a strategic distance from circles or drifting grounds.
6. Firmware and Software Coordination
Your collected circuit board might have a microcontroller or processor that needs firmware. Integration doesn’t conclusion with equipment — you must moreover guarantee your program works consistently with the electronics.
Steps:
• Upload and test firmware on the board some time recently last integration.
• Use investigating instruments like serial yield or rationale analyzers.
• For Boards with bootloaders (e.g., Arduino), make beyond any doubt your code underpins all associated peripherals.
Communication Protocols
Common conventions utilized amid integration include:
• I2C, SPI, UART: For interfacing sensors and modules
• GPIO Pins: For switches, transfers, or LEDs
• PWM: For engine control or diminishing LEDs
Ensure your firmware arranges the pins accurately and handles hinders or timing-sensitive tasks.
7. Security and Reliability
To guarantee long-term execution and safety:
Thermal Management
• Keep high-power components absent from delicate ICs.
• Use warm sinks or fans if needed.
• Design for satisfactory ventilation interior enclosures.
Electrical Safety
• Use legitimate separator for all high-voltage connections.
• Include wires or circuit breakers.
• Add TVS diodes or snubbers for inductive loads.
EMC and Noise
• Shield touchy components and cables.
• Use decoupling capacitors close control pins of ICs.
• Implement legitimate establishing methodologies (star ground, separated ground planes).
8. Testing and Debugging
Before fixing up your venture, perform intensive testing:
• Continuity Tests for all connections
• Power Tests with a seat control supply (constrain current initially)
• Functional Tests for each module and sensor
• Stress Tests beneath anticipated working conditions
Use millimetres, oscilloscopes, and rationale analyzers as required. Archive test comes about and troubleshoot any inconsistencies.
9. Last Assembly and Packaging
Once all tests are successful:
• Secure all associations utilizing zip ties, cable sleeves, or warm recoil tubing.
• Close the walled in area safely and name ports/switches.
• If your extend will be dealt with by others, incorporate documentation or names to direct usage.
If the extend is implied for clients or commercial purposes, guarantee the get together takes after quality control strategies and complies with important benchmarks (e.g., CE, FCC, RoHS).
10. Upkeep and Upgradability
Future-proof your plan where possible:
• Use measured connectors for simple replacement.
• Leave ICSP or SWD headers for reconstructing microcontrollers.
• Provide get to investigate ports or serial outputs.
• Use firmware that underpins remote updates (OTA) if applicable.
If the venture is sent in the field, guarantee it’s simple to benefit — name inside components, incorporate a benefit manual, and keep saves on hand.
Common Mistakes to Avoid
1. Ignoring control supply specs – Can lead to harmed components.
2. Messy wiring – Increments chance of brief circuits and hard-to-trace bugs.
3. Poor mechanical mounting – Can cause stretch breaks on patch joints.
4. No ventilation – Overheating can debase performance.
5. Skipping tests – Continuously approve each perspective some time recently finalizing.
Final Thoughts
Integrating an assembled circuit board into your venture is as much approximately consideration to detail as it is approximately inventiveness. A well-integrated board gets to be the brain of your venture, consistently collaboration with the physical world.
By arranging altogether, taking after best hones for mounting, wiring, and testing, and keeping up an eye on security and unwavering quality, you can guarantee that your extend not as it were capacities but flourishes in real-world conditions.
Whether you’re an gadgets specialist, a understudy, or a proficient design, acing this prepare will hoist the quality and polished skill of your manifestations.
Latest Blog


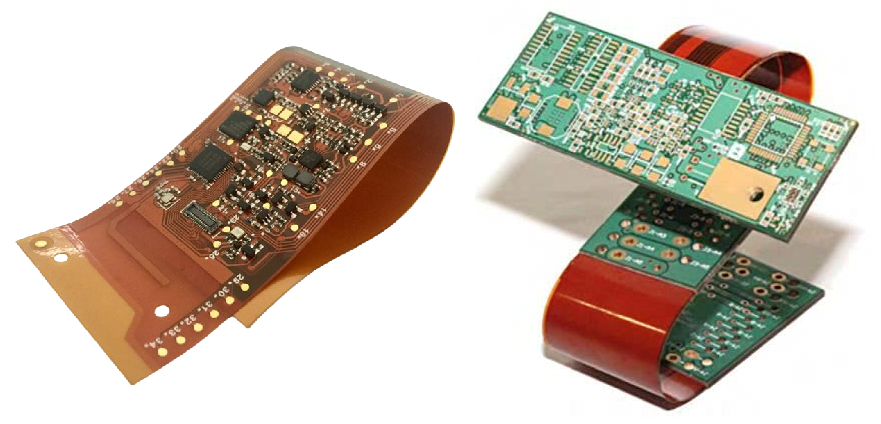

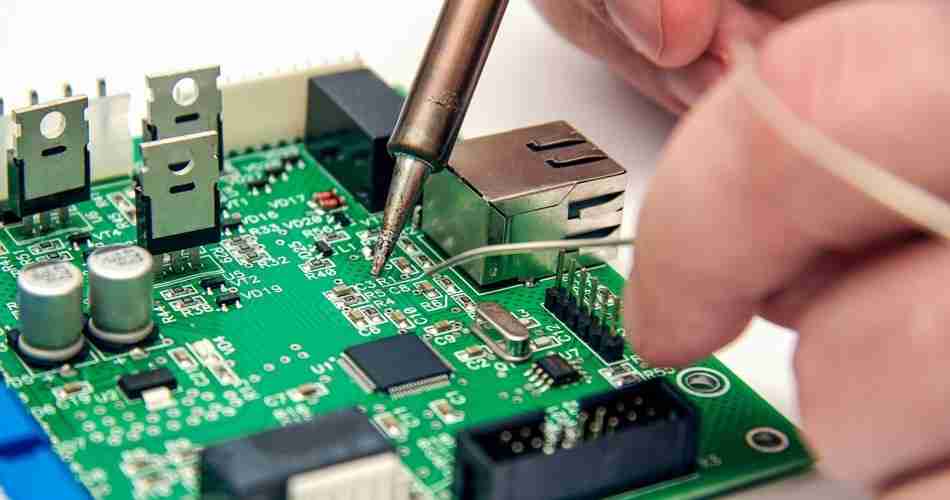
Table of Content
Contcat Us
Phone: +86-18123905375
Email: sales@circuitcardassembly.com
Skype: ali_youte
WhatsApp: +86-18123905375
Wechat: +86-18123905375

 Afrikaans
 Shqip
Shqip አማርኛ
አማርኛ العربية
 Հայերեն
 Azərbaycan dili
 Euskara
 Беларуская мова
 বাংলা
বাংলা Bosanski
 Български
 Català
 Cebuano
 Chichewa
 简体中文
简体中文 繁體中文
繁體中文 Corsu
Corsu Hrvatski
 Čeština
 Dansk
Dansk Nederlands
 Esperanto
 Eesti
Eesti Filipino
 Suomi
Suomi Français
 Frysk
Frysk Galego
 ქართული
 Deutsch
 Ελληνικά
 ગુજરાતી
 Kreyol ayisyen
 Harshen Hausa
 Ōlelo Hawaiʻi
 עִבְרִית
 हिन्दी
 Hmong
Hmong Magyar
 Íslenska
 Igbo
Igbo Bahasa Indonesia
 Gaeilge
 Italiano
 日本語
日本語 Basa Jawa
 ಕನ್ನಡ
ಕನ್ನಡ Қазақ тілі
 ភាសាខ្មែរ
 한국어
한국어 كوردی
كوردی Кыргызча
 ພາສາລາວ
 Latin
Latin Latviešu valoda
 Lietuvių kalba
 Lëtzebuergesch
 Македонски јазик
 Malagasy
 Bahasa Melayu
 മലയാളം
 Maltese
 Te Reo Māori
 मराठी
मराठी Монгол
 ဗမာစာ
ဗမာစာ नेपाली
 Norsk bokmål
 پښتو
پښتو فارسی
فارسی Polski
 Português
 ਪੰਜਾਬੀ
 Română
 Русский
 Samoan
 Gàidhlig
 Српски језик
 Sesotho
 Shona
Shona سنڌي
سنڌي සිංහල
සිංහල Slovenčina
 Slovenščina
 Afsoomaali
 Español
 Basa Sunda
 Kiswahili
 Svenska
 Тоҷикӣ
 தமிழ்
தமிழ் తెలుగు
 ไทย
ไทย Türkçe
 Українська
 اردو
اردو O‘zbekcha
 Tiếng Việt
 Cymraeg
 isiXhosa
 יידיש
יידיש Yorùbá
 Zulu
Zulu